

The sound is unmistakable. Drip. Drip. Drip. It starts as a faint annoyance in the middle of the night, but by morning, that sound represents something far more menacing than a lost hour of sleep. It represents a plumbing leak — one of the most common, destructive, and expensive problems a homeowner can face. If you are reading this, chances are you have discovered pipes are leaking in your home, or you are frantically searching for a water leak repair solution before your drywall turns into a waterfall.
Whether it’s a burst pipe in the basement or a persistent dripping pipe under the kitchen sink, water damage delays for no one. According to insurance data, the average water leak claim exceeds $10,000, making it imperative to act fast.
In this comprehensive guide, we will walk you through everything you need to know. We will cover the causes of plumbing leaks, the step-by-step methods to stop a leaking pipe, and the specific techniques for handling pipework leak scenarios, whether residential or commercial. By the end, you will know exactly how to handle a pipe leak — or know when it’s time to call in the cavalry.
Why Are My Pipes Leaking? Understanding the Root Cause
Before you can fix a problem, you need to understand why it is happening. The question “What causes plumbing leaks?” is searched by thousands of homeowners every month, and the answer is rarely the same. Plumbing leaks are usually the result of one of four specific conditions.
High Water Pressure
While it feels great in the shower, high water pressure is the silent killer of your plumbing system. Most residential plumbing systems are designed to handle water pressure between 40 and 60 PSI (pounds per square inch). If your pressure creeps above 80 PSI, it puts immense stress on your pipes, joints, and faucets. This constant force can slowly erode the integrity of soldered joints, leading to a sudden pipe leaking in your wall.
Corrosion and Age
If you live in a home built before the 1970s, there is a high chance you have galvanized steel pipes. These pipes have a natural lifespan of about 40 to 50 years. Over time, mineral deposits build up inside, and the walls of the pipe corrode from the inside out. This leads to pinhole leaks — tiny jets of water that spray aggressively into your cabinet space.
Frozen Pipes
Water expands as it freezes. When water freezes inside a pipe, it expands by roughly 9%. This expansion turns liquid water into ice crystals that have nowhere to go, creating a blockage. The pressure builds between the ice blockage and the closed faucet, causing the pipe to burst. This is the most common cause of catastrophic water leak repair calls in the winter.
Loose Joints and Fittings
This is the most common culprit. Often, a pipe leak isn’t actually in the pipe itself; it is in the connection. Over time, temperature changes cause metal and plastic to expand and contract. This can loosen compression fittings or crack soldered joints, allowing water to escape.

Emergency Response: What To Do When You Discover a Leak
When you see water dripping from a pipe, panic is a natural reaction. However, staying calm and following these three steps can be the difference between a minor repair and a major flood.
Step 1: Shut Off the Main Water Valve
Locate your main water shut-off valve. In most homes, this is located on the perimeter of the house, near the foundation, or in the garage where the water line enters. It is usually a wheel-style valve (gate valve) or a straight handle (ball valve). Turn it clockwise to shut off the water supply to the entire house. This immediately stops the flow of water feeding the leaking water pipe.
Step 2: Drain the System
Once the water is off, open all the faucets in the house — starting from the highest point (upstairs bathroom) to the lowest point (basement sink or hose bib). Flush the toilets. This drains the water remaining in the lines, relieving pressure on the pipes are leaking.
Step 3: Eliminate Electrical Hazards
If the leak is near any electrical outlets, fixtures, or appliances, turn off the electricity to that area at the breaker box. Water and electricity are a lethal combination. Never walk through standing water to access a breaker box; if necessary, call the power company or an electrician.
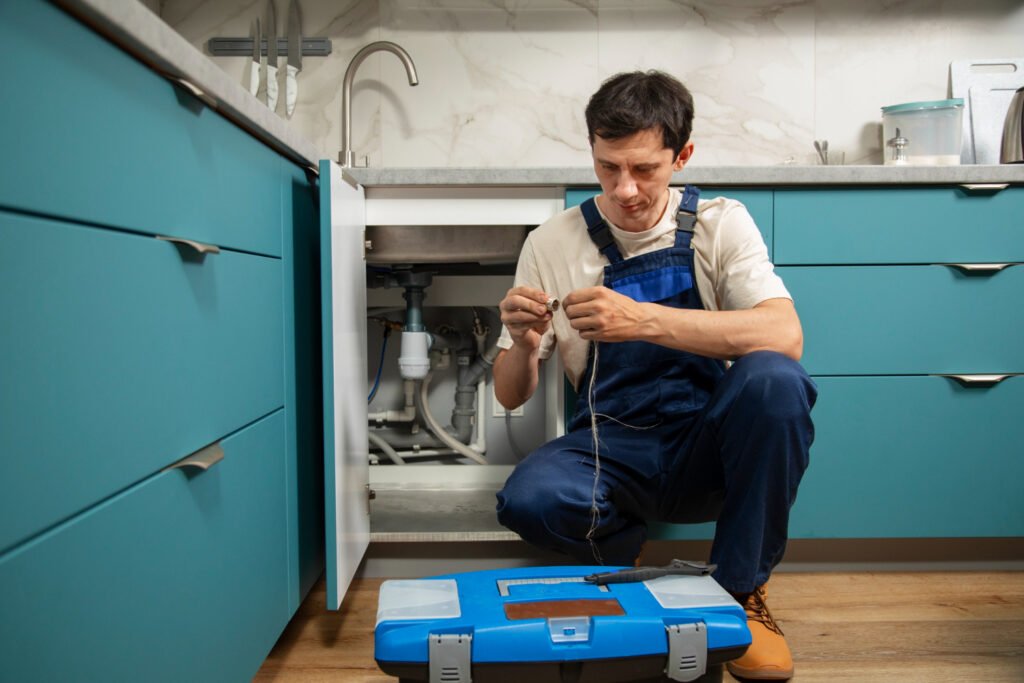
How to Fix a Leaking Pipe (DIY Methods by Pipe Type)
Once the water is off and the area is safe, it is time to address the actual pipe leaking. The method you use depends entirely on what your pipes are made of. Here is how to fix leaking plumbing based on common pipe materials.
Fixing a Leaking Copper Pipe
Copper is durable but prone to “pinhole leaks” due to corrosion.
- Method A: The Slip-Coupler Repair (Permanent)
This is the professional method. You will need a pipe cutter, emery cloth, flux, a propane torch, and a slip repair coupling (which has no center stop). Cut out the damaged section of the leaking water pipe using the pipe cutter. Clean the outside of the pipe ends with emery cloth. Apply flux to the ends and inside the coupling. Slide the coupling entirely onto one pipe, then center it over the gap. Solder the joints. This stops the pipe leaking permanently. - Method B: Epoxy Putty (Temporary)
For an emergency water leak repair, epoxy putty is a lifesaver. Shut off the water and dry the pipe completely. Knead the two-part epoxy putty until it is a uniform color. Press it firmly over the leak, molding it around the pipe like a bandage. Wait for the manufacturer’s specified cure time (usually 30 minutes) before turning the water back on. This is perfect for stopping a dripping pipe over the weekend until a plumber arrives on Monday.
Fixing a Leaking PVC Pipe
PVC is common for drains and vents.
- The Cut-and-Replace Method:
If you have a pipework leak in a PVC drain line, you cannot simply patch it with glue; glue requires a fitting. Use a hacksaw or PVC cutter to remove the damaged section. Clean the edges of the existing pipe. Dry-fit a new section of pipe with two couplings and a new piece of pipe. Once you are sure it fits, apply PVC primer and then PVC cement to the joints and assemble quickly. Hold for 10 seconds.
Fixing a Leaking Joint (Without Cutting)
Often, the pipe leak is happening at a threaded connection.
- Tightening the Fitting:
If it is a compression fitting (often found under sinks for supply lines), try giving it a slight turn with a wrench. A quarter turn is often enough to compress the ferrule tighter and stop the leaking pipe. - Teflon Tape and Pipe Dope:
If the leak is coming from a threaded joint, you may need to disassemble it, clean off the old tape or sealant, apply fresh Teflon tape (wrap it clockwise), and reassemble. For extra security, apply pipe joint compound (pipe dope) over the tape.
The “Emergency Wrap” Method
For any type of pipe where you don’t have the tools for a permanent fix, use the rubber and clamp method. Take a piece of rubber (an old garden hose cut open, or a piece of rubber sheet). Place it over the pipe leak. Secure it tightly with two hose clamps (jubilee clips) placed on either side of the leak. This creates a watertight seal that can hold for weeks.
The “Pipework” Problem: Commercial vs. Residential Leaks
The term pipework leak often implies a more complex system than a single pipe under a sink. Whether you are dealing with residential or commercial plumbing changes the game entirely.
Residential Pipework Leaks
In a home, pipework leaks often manifest as “slab leaks” (pipes running under the concrete foundation) or leaks inside wall cavities. These are tricky because you cannot see the source. You might notice a hot spot on the floor (for hot water lines) or the sound of running water when everything is off. Residential leaks usually require cutting into walls or floors to access the damaged area.
Commercial Pipework Leaks
Commercial buildings operate on a different scale. They often have:
- Higher Pressure Systems: Water pressure in commercial buildings can be significantly higher to supply multiple floors.
- Different Materials: You may encounter black iron for gas lines, large steel pipes for hydronic heating systems, or cast iron for waste lines.
- Complex Recirculating Loops: Hotels and hospitals often have recirculating hot water systems that loop throughout the building, creating multiple potential leak points.
A pipework leak in a commercial setting usually requires immediate shutdown due to safety protocols. These repairs often involve certified welders, specialized press-fit tools, or pipe freezing techniques rather than DIY soldering. If you manage a commercial property, never attempt to fix a high-pressure line yourself.
Identifying the Culprit: A Guide to Leak Symptoms
Sometimes, you cannot see the pipes are leaking, but you know something is wrong. Water is sneaky; it travels along beams and behind baseboards before it ever shows itself. Here is how to diagnose by symptom.
The Dripping Sound
If you hear a dripping pipe but cannot see it, turn off everything in the house that uses water. Go to the water meter. If the meter is still spinning, you have a leak. Listen carefully in the walls—a hissing sound often indicates a pressurized spray. At night, when the house is quiet, use a mechanic’s stethoscope (or even a glass pressed to the wall) to pinpoint the location.
Wet Spots and Water Stains
Yellow or brown rings on the ceiling are a classic sign of a leaking water pipe above. If the drywall feels soft or spongy, the water has saturated the material, and the leak has likely been there for a while. Bubbling paint or peeling wallpaper are also telltale signs that moisture is present where it shouldn’t be.
The Mysterious Pipe Leaking Behind Drywall
To locate a leak without demolition, look for the lowest point in the wall where water damage appears. Water runs downhill. A thermal imaging camera (which can often be rented from a hardware store) can spot temperature differences caused by moisture. Alternatively, moisture meters can confirm whether a drywall section is wet without cutting into it.
The Spike in Your Water Bill
If you have no visible signs but your water bill has doubled, you likely have a hidden plumbing leak. Check your water meter, wait two hours without using water, and check again. If the numbers have moved, water is escaping somewhere.
Professional “Water Leak Repair”: When to Call a Plumber
While DIY is great for accessible pipe leaks, some situations demand professional water leak repair services. Knowing when to put down the tools and pick up the phone can save you thousands of dollars in the long run.
Call a plumber immediately if:
- The leak is inside a concrete slab: This requires specialized electronic listening devices and potentially jackhammers. It is not a DIY job.
- The leak is in the main water line: This is the line running from the street to your house. Digging and replacing this requires permits, heavy machinery, and knowledge of local building codes.
- You have turned off the water, but the damage is extensive: If you need help with drywall repair, mold remediation, or drying out the structure, plumbers often work with restoration companies.
- The pipes are behind a finished wall or ceiling: If you are not prepared to re-drywall and repaint an entire room, it is often better to let a professional make a small, strategic hole and repair it properly.
- You try a DIY fix and it doesn’t hold: There is no shame in admitting defeat. A temporary patch that fails can cause more damage than the original leak.
Prevention: How to Stop “Plumbing Leaks” Before They Start
The best water leak repair is the one you never have to do. Prevention is key to protecting your home and your wallet. Here is a seasonal maintenance checklist.
Install a Water Pressure Regulator
If your water pressure is consistently above 60 PSI, install a pressure regulator. It is a relatively inexpensive device that sits on the main water line and protects your entire plumbing system, including your water heater, washing machine, and dishwasher, from excessive stress.
Know Your Shut-Off Valves
Ensure everyone in the house knows where the main water shut-off is. Additionally, locate the individual shut-off valves under sinks and behind toilets. When pipes are leaking, seconds count. Knowing exactly which valve to turn can contain a flood to a single cabinet rather than the entire floor.
Seasonal Checks
- Spring/Summer: Check outdoor hose bibs for leaks. Inspect washing machine hoses—if they are bulging or cracked, replace them immediately. Steel-braided hoses are more durable than rubber.
- Fall: Before the first freeze, disconnect all garden hoses. A hose connected to an outside faucet can trap water and cause the pipe inside the wall to freeze and burst. Insulate pipes in unheated areas like crawl spaces and attics.
- Winter: Keep your thermostat set to a consistent temperature, even when you are away. If you leave for vacation, have someone check the house daily.
Monitor for Signs
Periodically check under all sinks for signs of moisture or corrosion. Look at the ceiling for new stains. Listen for drips. Catching a pipe leak early makes the repair easier and cheaper.
Conclusion
Dealing with plumbing leaks is stressful, but it does not have to be a disaster. By understanding the causes and knowing the steps for water leak repair, you can take control of the situation. From tightening a loose joint to applying an epoxy patch to a dripping pipe, you now have the knowledge to handle most minor pipe leaks.
Remember, whether it is a simple pipework leak under the sink or a major burst in the basement, the principles are the same: shut off the water, identify the source, and apply the appropriate fix. For the high-volume searchers looking for “how to stop a leaking pipe,” the answer lies in preparation and the right technique.
Water may be relentless, but with this guide in your toolkit, you are ready to fight back. Bookmark this page, share it with your family, and sleep a little easier knowing you are prepared for the drip in the dark.


")


